Introduction
The Filter option in the variable manager allows users to tailor the list of values displayed for a variable, offering a more focused and context-specific experience. Configure queries that dictate which values appear in the dropdown menu when using a variable, thus enhancing the usability and relevance of data for a wide range of applications.
Create the Filter
- From Dashboard > Dashboard 2.0, create a new dashboard or select from an existing dashboard collection.
See Create Dashboards to learn about creating dashboards. - Click the Variable Icon
 and select Edit.
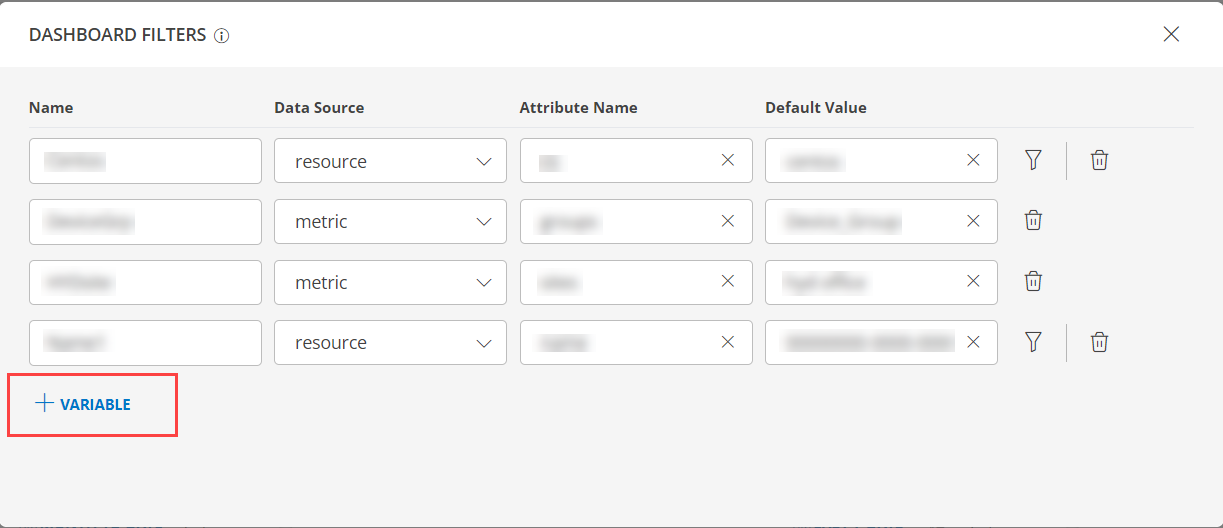
- The DASHBOARD FILTERS page is displayed.
Notes:
- You will be able to manage variables here to enable filters.
- Select Name, Data Source, Attribute Name, Default Value.
- At the partner level the metric filter is not enabled.

- Click + VARIABLE.

- Enter the below mentioned information:
| Functionality | Description |
|---|---|
| Name | Enter a name for the filter. |
| Data Source | Choose the data source name from the dropdown list box. |
| Attribute Name | Enter the attribute name for the filter. |
| Default Value | Enter the Default value for the filter. |
- Click View Filter
 option.
Note: The View Filter option is not available for Metric.
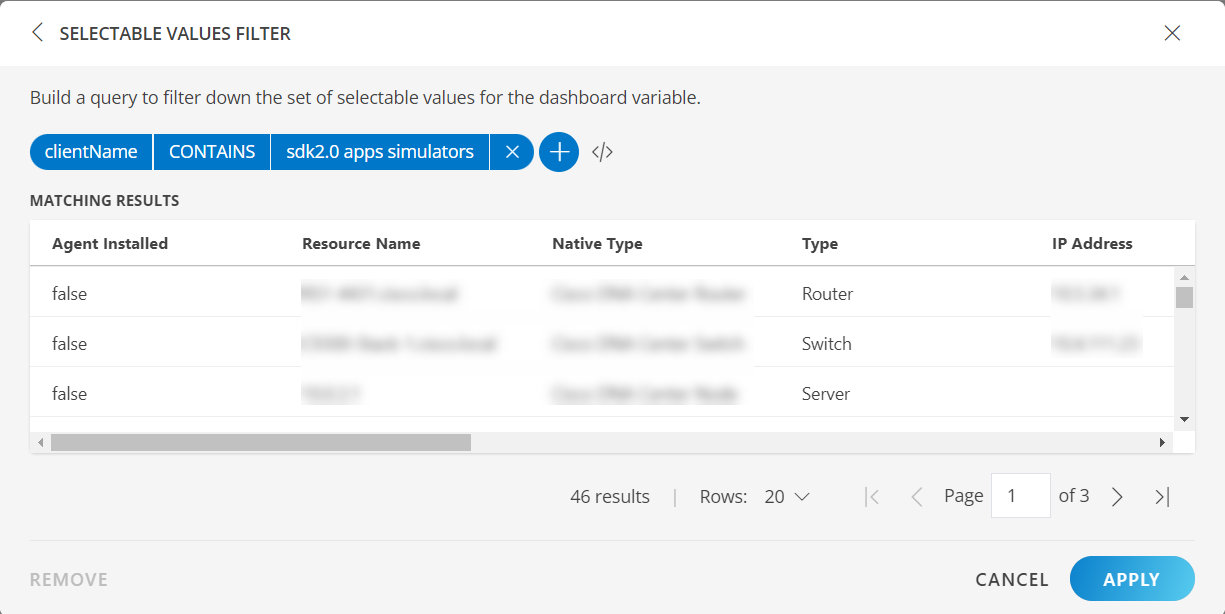
- Click the + QUERY and select the options from the following drop-down lists as you build the query:
Attribute =
clientNameOperator =
CONTAINSValue =
sdk2.0 apps simulatorNote: You may also build a query by clicking the </> to use the advanced query builder and start typing the query and complete the query.

- Click APPLY.
- Click SAVE. The filter is saved and the information is displayed.

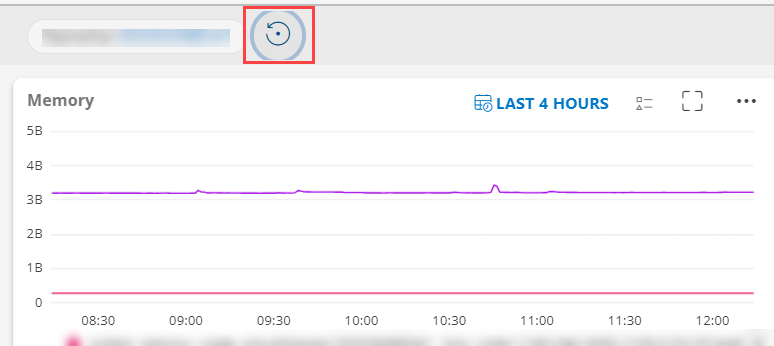
Note: Users with View Dashboard permissions can only click the reset option for variables.
